SharePoint 2013 is an extraordinary web development platform that can help in a seamless designing of a website for your business due to its document sharing and business collaboration features. It has greatly simplified the critical website development task that earlier used to be very cumbersome activity due to the requirement of great deal of programming knowledge and expertise.
With the Design Manager of SharePoint 2013 platform, it is now much easier to create SharePoint master page for your achieving an exceptional website according to your business aspirations and requirements. This Design Manager can help in converting an HTML file into a SharePoint 2013 master page without any trouble. Once the conversion is done, the HTML file and master page are linked with each other which means any changes that are done in an HTML file are automatically reflected into the associated master page as soon as the edited HTML file is saved. A HTML file is required during the creation of SharePoint 2013 master page as the development process needs certain elements like controls and content placeholders that are helpful in the correct rendering of a master page. Before converting your HTML file into a SharePoint master page, you need to upload all the design files along with the designated HTML file. Here are the steps that are mentioned below for the seamless conversion of HTML file into a master page file.
- You need to browse your publishing site.
- Choose “Settings” option located on the upper right corner of the page and then select “Design Manager”.
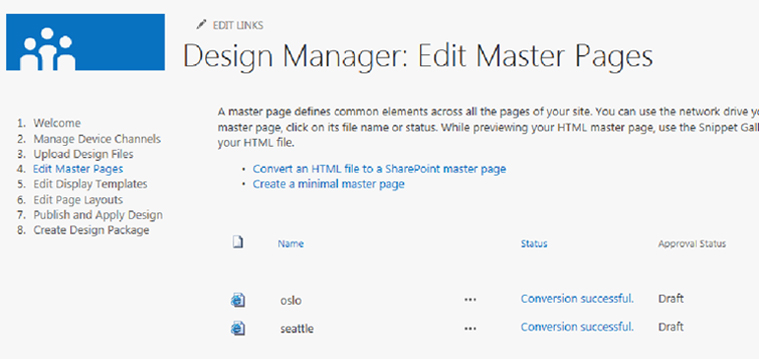
- From Design Manager, you need to select “Edit Master Pages” option present on the left navigation pane.
- Now, select “Convert an HTML file to a SharePoint master page” option.
- Under “Select an Asset” dialog box, you need to browse and select the HTML file that you want to convert.
- Select the “Insert” option. With this step, the required HTML file is converted into a .master page file with the same name. Under Design Manager, you can find the two possible statuses for your HTML file which are namely, Warnings and Errors and Conversion successful.
- You need to check the link of your Status column for having a preview of your master page. It is recommended to resolve any warnings or errors in your HTML file for the effective display of your SharePoint master page.
- In order to resolve any errors, you need to edit the HTML file that is present in the mapped drive of the server. While making any changes and then saving the HTML file, the changes implemented are automatically synced with the linked .master page file.
- Once you get the successful preview of the master page, you can see a <div> tag which is added to your HTML file. Scroll down the HTML file to see the required <div> tag.
Note- This <div> tag is the main content block and is present inside a content placeholder known as Content Place Holder Main. You need to position this <div> tag at the desired location where you want the page layout to appear on the SharePoint master page.
By following these simple tips, you can seamlessly convert your HTML file into SharePoint master page for achieving an amazing SharePoint website of your dreams. However, if you do face an issue during the customization of master pages for your SharePoint 2013 platform, you can engage with our company, Velocity through our phone number +1 (424) 653-6907 or can mail us at [email protected] for that extraordinary SharePoint website.

